List 10 Engineering Drawing Equipment and Their Uses
Hey Guys, In this article, You are going to learn in details about "What is Civil Engineering Drawing?Its Scope, Precautions, Drawing Instruments."
So, Let's Get Started.
What is Civil Engineering Drawing?
Table of Contents
- What is Civil Engineering Drawing?
- The scope of Civil Engineering Drawing.
- Precautions in Drawing Work.
- Engineering Drawing Instruments.
- List of Engineering Drawing Instruments and Their Uses.
- 1. Drawing Board.
- Standard Sizes of Drawing Board and Drawing Sheets of American Standard Association.
- Standard Sizes of Drawing Board and Drawing Sheets of British Standard.
- 2. T-SQUARE:
- 3. Set -Square.
- 4. Compass.
- 5. Divider.
- 6. French Curves.
- 7. Protractor.
- 8. Scale Cards.
- Types of Scale Cards:
- 8.1. Plain Scale.
- 8.2. Diagonal Scale.
- 9. Pencil.
- Grades of Pencil.
- 9.1. Hard Grade.
- 9.2. Medium Grade.
- 9.3. Soft Grade.
- 10. Sharpener and Sand Paper Pad.
- 11. Scotch Tape And Drawing Pin.
- 12. Eraser And Wiper.
- 13. Ink And Blade.
- 1. Drawing Board.
- Fixing of the Drawing Sheet on the Drawing Board.
- Boundary Line And Title Block/Title Strip.
- List of Engineering Drawing Instruments and Their Uses.
Drawing is such an Art through which expression of thoughts and imaginations is done with the help of lines forming various figures.
Expression of imaginations is done through drafting in a better way.
The explanation of size, material, and construction of an object is done by drawing diagrams of an object.
No project of engineering can be completed unless its engineering drawing is not prepared.
In this way, the merits and demerits of a project are known beforehand.
Therefore, one can find a chance to remove the defects of the project before starting the construction work.
In addition to this, it is the only way to provide full details of the project to the personnel to be employed on the project.
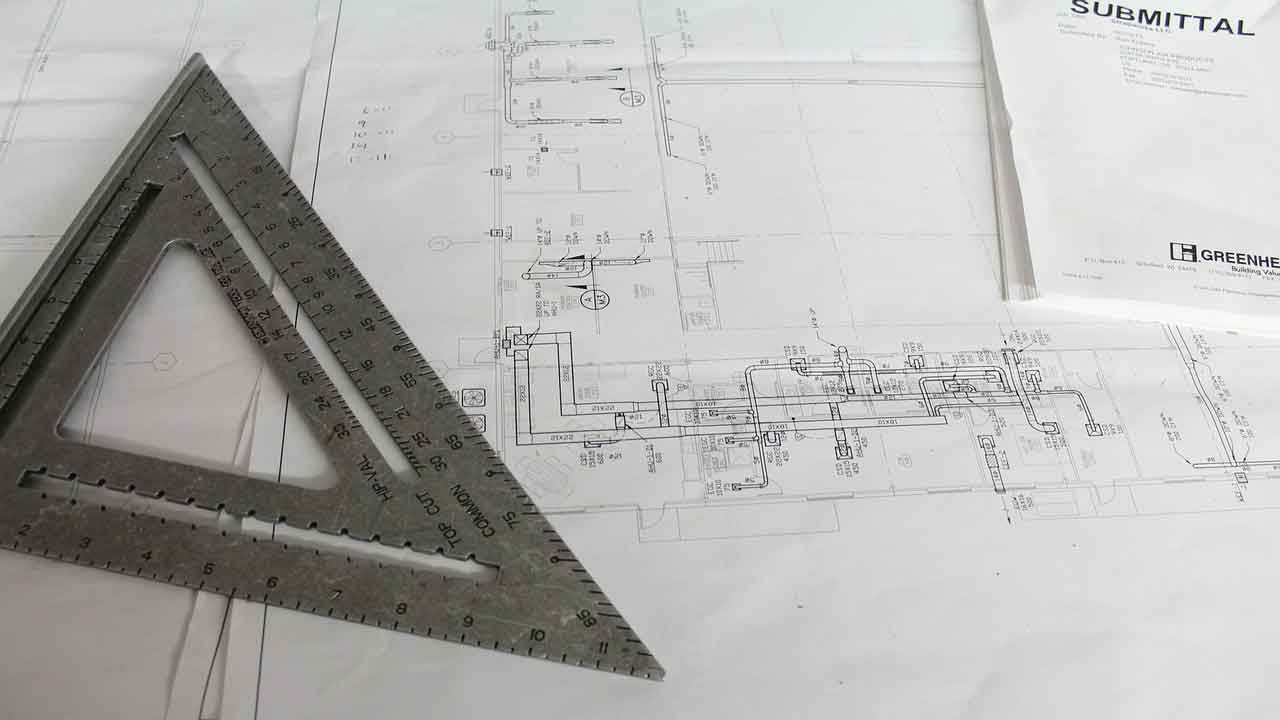
Drafting is called the International language of engineering.
It is because the other languages used in the world are spoken and understood in some specific area whereas drafting interprets engineering in every part of the world.
Drafting is also called Graphic Science. As, any sentence means some specific concept in other languages, so, in the same way, every line of engineering drawing has a separate concept.
Free Hand Drafting is done before actual Civil Engineering drawing.
Pencil and erasers are used for this purpose while foot-rule, compass, and other instruments are not used here.
Not much time is taken for this purpose.
However, the standard of this drawing is not up to the mark. Dire consequences are faced, in case; there are some mistakes in drawing.
The drawing should be properly checked after finalizing it so that the damage, if any, should be avoided.
The scope of Civil Engineering Drawing.
By civil drafting is meant representation of civil engineering projects through drawings.
The drawing of various projects is prepared, before starting them.
Then its merits and demerits are pondered over.
Then its defects are removed and the material to be used is selected.
Final acceptance of the drawing is obtained from the concerned authority. After this, the actual project is started.
Without getting proper command on the subject of civil drafting, the other subjects like Quantity Survey and Building Construction, etc. can not be studied properly.
Drawing is used in all types of construction.
Without the proper knowledge engineering drawing, you'll never be able to work in Civil Engineering.
Watch the video below to understand the Civil Engineering Drawing and Drawing Instruments.
Precautions in Drawing Work.
Following precautions should be adopted while preparing a civil engineering drawing.
1. Drafting work should not be started without cleaning the drawing instruments.
2. T square should not be used as a hammer.
3. Do not sharpen a pencil on the drawing board or any other drawing instrument.
4. Do not make a heap of instruments on the drawing board.
5. Scale card should not be used in place of a ruler.
6. Do not use the lower edge of the T for drawing lines.
7. Do not use a divider for making holes on the sheet or removing pins.
8. Do not fold the drawing sheet at any cost, before completion.
9. Do not use the compass in loose condition.
10. Do not put a deep mark on the surface of the drawing board.
Engineering Drawing Instruments.
Different types of instruments are needed for Constructing drawing work. Different types of instruments are Used for different kinds of lines.
T-Square and Set-Square are required for straight lines, while the compass is needed for drawing curves.
A French curve is required for drawing arcs of changing radii.
Standard of work depends on the instruments standard. Therefore, an instrument of high quality should be used.
They should be maintained in good condition.
The instruments should be cleaned before and after use.
Drawing sheets of different sizes are used.
According to British Standard sheets of sizes; Quarter Imperial, Half Imperial, Full Imperial, Double Imperial, and Antiquarian are used.
While according to American Standard, drawing sheets from size A to E are used.
Before preparing a drawing, the size of the object and that of drawing sheet are considered for appropriate scale.
Drawing of a very small object is constructed in a bigger size, and that of a big object is constructed in small size.
In this way, scales are used to make the size of the object small or big.
The ratio between the original sizes of the object to the size of its sketch is called scale.
Scales are of two types: The first one is called Plain Scale whereas the second one is called Diagonal Scale.
Two measurement units are represented on the plain scale like meter or decimeter, millimeter, foot, and inches, etc.
While three units are represented on the diagonal scale like meter, decimeter, and a millimeter or as a yard, foot, and inch, etc.
Border and title strip or title block are formed on the drawing sheet to make it clear and beautiful.
Necessary information regarding drawing is recorded in the title block/strip.
List of Engineering Drawing Instruments and Their Uses.
Many instruments are required for constructing a drawing.
Following are the important instruments used for engineering drawing.
1. Drawing Board.
This is the most important instrument used in drawing. This is made from fine wood.
Its surface is level.
Grooves are made beneath it to avoid weather effect on it.
Drawing boards of different sizes are available.
The choice of size should be had according to requirement.
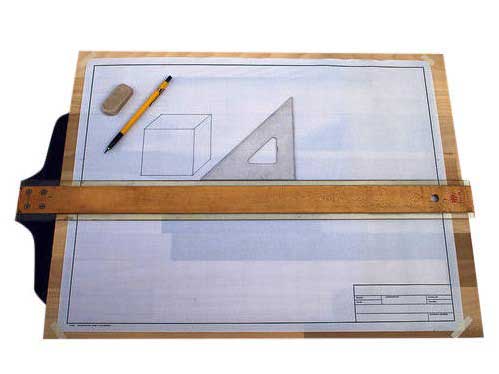
The standard of the drawing board and drawing sheet of the following sizes are as follows:
Standard Sizes of Drawing Board and Drawing Sheets of American Standard Association.
Standard Sizes of Drawing Board and Drawing Sheets of British Standard.
2. T-SQUARE:
T-Square is known as "T" in ordinary language.
This consists of two parts. The long part is called "Blade" while the short part is called "Head."
These two parts are fixed with each other at 90° angle.
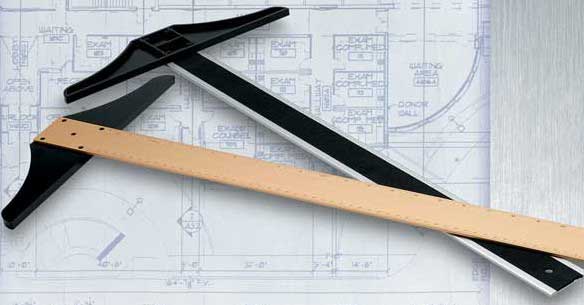
T-Square is used to draw horizontal lines.
For this purpose, the head of "T" is held firmly on the left corner of the drawing board and is rotated up-and-down and the line is drawn where necessary.
Vertical lines, cannot be drawn with it.
3. Set -Square.
Set-Squares are generally made of celluloid. Their edges are beveled.
However, the edges of some set squares are straight as well.
Marks of centimeter and millimeters are grooved on the set squares.
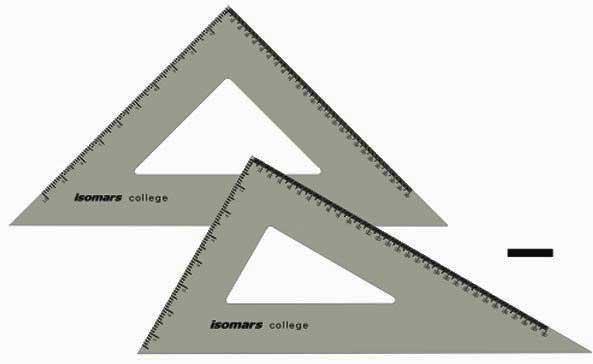
One angle of the set square is of 90° while the other two are of 45° each.
While there are angles of 60°, 30° and 90° on the other set square.
All the angle of a multiple of 15° can be constructed with the help of set squares. In addition to this, set squares can be used to draw perpendiculars and parallel lines.
4. Compass.
A compass is used to draw arc and circles. Basically, it is of two types.
a). Friction Joint Compass.
b). Spring Joint Compass.
The first type of compass is not considered better because it is difficult to set it.
Both the legs of such a compass are joined with a pin. If its joint is hard, then it is difficult to set it correctly and to take some definite measurement.
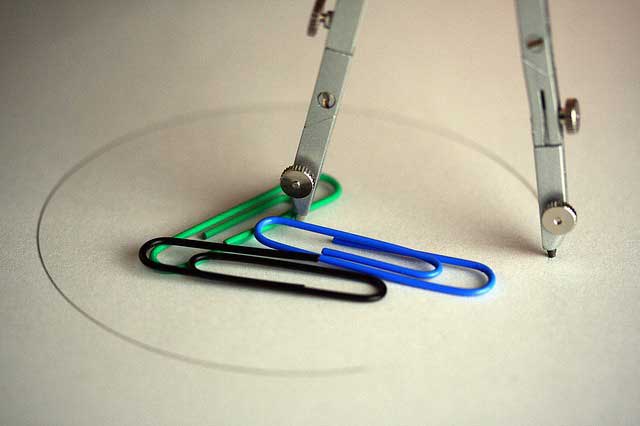
Contrary to this, if the joint is loose, then its legs open automatically while drawing an arc.
The second type of compass is considered better. It is available in different sizes.
There is a fitting nut between its two legs. This allows the compass to open and close.
One end of this compass has a steel pin while it has a lead on its second leg.
This compass can be prolonged by an extension bar fitted with the lead leg.
5. Divider.
This engineering drawing instrument is like a compass, but the pencil is not used in it.
Both of its legs have needles at the ends. This is used for taking straight and curved measurements.
It is also used to transfer any measurements to some other place.
The graduation of ruler becomes spoiled while taking measurements. Therefore, divider should not be used directly on the ruler.
6. French Curves.
A French curve is made of celluloid. This is used to draw such curves which have no uniform radius and that a compass cannot be used.
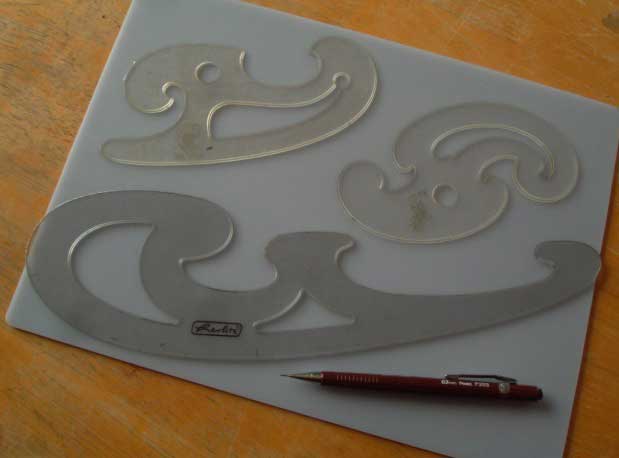
They are of different shapes. The place where the irregular arc is required, there three points are selected and are joined by French curve.
7. Protractor.
A protractor is called "D" in ordinary language. These are made of celluloid and are used to construct and measure angles.
Generally, protractor of the semi-circle is used which can construct and measure angles up to 180°.
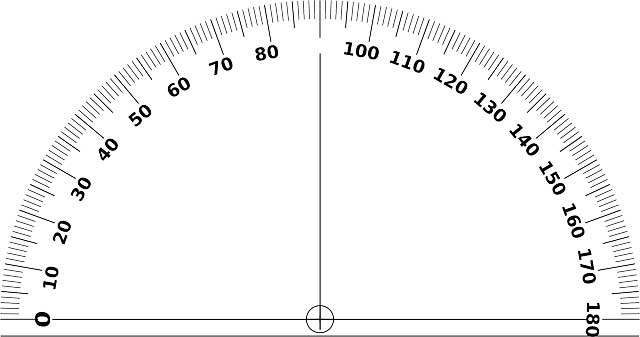
Circular protractors are also available in the markets.
Such protractors have 360° graduated on them.
The zero of the protractor is placed at the point of a line where some angle is to be constructed. Then the center is brought to the required point, and a mark is put there on the required angle.
8. Scale Cards.
The actual measurements cannot be used while constructing a drawing of an object. It is to be enlarged or shortened.
Particular types of the ruler are used for this purpose. These rulers are called Scale Cards.
These cards are made of asbestos or plastic.
Thus, scale cards are used in the field to changing the actual measurements in the desired ratio and proportion.
Types of Scale Cards:
Two types of scales are used in the drawing:
(1) Plain Scale.
(2) Diagonal Scale.
8.1. Plain Scale.
This type of scale is generally used in drawing a sketch.
According to this scale, two units of measurement are represented like meter and decimeter, yard and foot or foot and inch, etc.
8.2. Diagonal Scale.
According to this scale, three units of measurement are represented like a kilometer, meter, centimeter and miles, furlongs and yards, etc.
The rule of similarity of triangles is employed in the construction of this scale.
In this scale, the two big units are represented length-wise while the third small unit along the breadth.
9. Pencil.
Various types of pencils are available. They contain lead mostly. Some of the pencils are hard while some are soft.
These grades of pencils are written on them.
The softest pencil is 7B while the hardest one is 9H.
Pencils from H to 4H are generally used in engineering drawing for drawing different lines.
Grades of Pencil.
Following are the different grades of the pencil:
9.1. Hard Grade.
This category includes grade H pencils. These are available from H to 9H in the market.
Generally, such pencils are used in drawing work.
9.2. Medium Grade.
Such pencils are used generally in ordinary drawing work.
HB grade pencils are included in this category.
9.3. Soft Grade.
Such pencils are used generally in Art Work and Shading purposes.
B grade pencils include in this category.
Note: While using pencils, they should not be held perpendicularly, whereas, they should be held from 60° to 75° angle.
Uniform pressure should be maintained during the use of pencils. While drawing, they should be rotated slowly.
10. Sharpener and Sand Paper Pad.
A pencil sharpener is used to sharpen a pencil.
Ordinary types of sharpeners sharpen a small portion of the pencil.
Sharpener of good quality should be used which can sharpen to at least 10 millimeter lead. After this, sandpaper pad needs to be used to make its shape better.
The use of sand paper pad should be done frequently to keep the required shape of the pencil end.
11. Scotch Tape And Drawing Pin.
Transparent Tape is used for sticking the drawing sheet on the drawing board, which is known as Scotch Tape.
This tape is applied at the corners of the sheet.
Drawing pins can also be used for sticking the sheet. However, the drawing pins spoil the surface of the drawing board.
That is why the pins are not preferred.
12. Eraser And Wiper.
An eraser is used to remove extra lines. The eraser should not be very hard otherwise there is a danger of tearing of the sheet.
The unwanted matter produced due to the use of eraser should be removed with the help of wiper so that the drawing may not be dirty.
13. Ink And Blade.
Drawing prepared with a lead pencil is redrawn with the help of ink to make it durable. This work is done on the Tracing Cloth.
If some extra line is drawn during ink process, this should not be removed with wiper, instead of it, the blade should be used for this purpose.
Fixing of the Drawing Sheet on the Drawing Board.
Place the drawing sheet on the board upward and to the left side of the drawing board.
Make the upper edge of the sheet parallel with the blade of T-Square.
Place scotch tape pieces at the comers of the sheet, while holding the sheet pressed firmly on the board.
Now, place the T-Square near the lower edge of the sheet and put scotch tape pieces at the comers of the sheet.
Boundary Line And Title Block/Title Strip.
Boundary line is drawn on the sheet after fixing it on the board.
In case, half of the sheet is to be used, then, after making the sheet half, make a border by HB pencil, after leaving 2 cm at its left end and 1 cm on all other sides.
The left extra distance is kept so that sheet could be filed properly.
For making the tittle block, inside the margin, 100 mm horizontal and 14 mm vertical distance is taken.
The detail like drawing by, checked by, date of starting and completion, and the name of drawing, etc., of the drawing, is recorded in it.
A title strip is made these days.
For this purpose, a strip of 16 mm is made on the lower line of the margin.
It is divided into four equal parts.
In the first part from the right, the number, date, and scale of the drawing are written.
The name of the drawing person and checker in the second part is written.
The name of the drawing is written in the third part.
Moreover, the name of the department is written in the fourth part.
Thanks for Reading this Article! Don't Forget to Share it.
Read Also:
Perspective Projection, Drawing – Its Types, Objectives, Methods.
Oblique Drawing, Projection – its Types, Examples.
List 10 Engineering Drawing Equipment and Their Uses
Source: https://civilseek.com/civil-engineering-drawing-instruments/
0 Response to "List 10 Engineering Drawing Equipment and Their Uses"
Post a Comment